Dienstag, 26. August 2008

Non NWN2 commercial break for IDVINC

Heya all ! Waiting for the prefabs ? Yeah, me too :)

Again, I´m a little late with my stuff. All files are ready for upload, all pictures for the tutorials captured and the webspace cleaned up. The only thing left is writing the tutorials (I could need a beta tester for this... anyone interested ?)

But this time I have a good excuse for the delay. I had the opportunity to do some project work for IDVINC (the makers of speed tree). So I´ve setup a little river scene in 3D Max, only using one sunlight source and one tree variation. This should provide a "ingame" look. It took the whole weekend, but I think it was worth it. Here are some of the results I would like to show of today:


You can find some more pictures on the speedtree gallery website.

So, enough for this little side project. I´m going back to the prefab website right now because I´m so eager to finish the stuff asap !!

Mittwoch, 20. August 2008

Hard days night

Just a quick wednesday update. Grimm is coming a long very good with the 14 indoor areas for the island. Great job so far !
I have set up a little area in a hurry yesterday. I want to use the steps I have been trough as a tutorial how to paint with my textures, basic area layout and color painting. On the left you can see the centerpiece, just some old farmhouse . There is also a river and a grassy part in this area.
I´m now going to write down the steps. After that I will feed the webpage with some content and setup the daycycle files ready for download. But I won´t finish this until the weekend. So, just a little delay. But after everything is setup once I will release some more stuff on weekly bases.

Going back to work now...

Sonntag, 17. August 2008

I see strange lights...!

I have finally found a little help with finishing my first prefab area ! Grimm182 signed in to help me with the indoor areas and he is doing a great job ! Thanks a lot for helping me with this !

While I was adding some smallish areas to the island today, I surfed the forums. "973_Mops_379" posted an update of his custom speedtree works (see here). He has released the first version of his shrooms on the vault. He has done some fantastic trees ! I was instanly inspired and decided to mess around with his models and try to make kind of swamp area (inspired by the "Zanga Marshs" in World of Warcraft). In addition to that I did some (strange) lightworks. And I accidently found a way to do self luminous textures. Here are the results:


I´m going back to finish the last few things on the surface of the island. With the help of Grimm I we should be able to finish the prefab in two weeks. As for the textures and the weather states, I will try to release them by Wednesday.

So,well, .... see you next Wednesday :)

Montag, 11. August 2008

Teasing the teaser

Heya everyone...! I´m back in the civilized world after a fantastic weekend on a rocking festival near my hometown here in germany.

Today I have started with the finishing touches of the first prefab area I want to release. It is a small island on the coast of Eden. It is yet very detailed, but a lot of painting is left to do. There is also a need for placing some objects in the village and finishing two (outdoor) caves. Anyways... I think I´m still a little drunk, so I made a teaser image of the area for the webpage tonight instead of fighting with the toolset. This might give you small (!) impressions of what to expect. You could also download this old video to see some moving pictures :)

And when it comes to details, I could need a little help to save some time: If someone is interested to do some interior design for the village and some other houses or caves... drop me a line :) Or would it be better not to place anything and let the modders do this ? I am not sure about this right now.

Anyways... tomorrow I will finish tweaking the textures and the 2da file for them. Hopefully I have the time this week to get the webpage running. I´m planning to release the first files within the weekend or the next week (depending if there is a possibility to visit another festival).
You see, things are going along quit well and I´m really looking forward to release something after all these months fighting with my ideas / time / the toolset. And mainly I am looking forward what other people will do with my stuff.

Until then... keep on rocking in a free world !

Donnerstag, 7. August 2008

In the making...

I have been quit productive the last week and things are coming along quit well.

I have finished working on my webpage for the prefabs stuff I plan to release. Why build a website for this ?I thought about that too. But I came to to conclusion, that it would be a good idea to show how to use the textures and light settings the best way. Wich textures match the best in a set ? How to paint them "correctly" to get the best results and so on. So, I needed a space for that. And this blog is probably not the best way to do this. I will continue to use it for progress documentation instead.

Anyways... I am currently tweaking the textures for the release. I am not sure if I should release them all at once or in themed packages. That is because I want to include a matching area where I use these textures. And these areas needs a finishing touch before I release them. I think I can give away some more infos the next week along with the first release of a texture pack. Here is a little preview of what you can expect.

I have some few days off now and I am going to a little music festival this weekend. It will be a lot of fun and hopefully I get my head clear so I can go to work more relaxed than I did the last weeks. So, stay tuned and have a nice weekend :)

Donnerstag, 24. Juli 2008

Break the silence

Two month not a single word ? Yeah, I know...
I wasn´t into the toolset a lot, since I work with another editor the whole day at the company. And besides all the bugs this editor has, it´s very fast to work with when it comes to placing objects. Besides that, my company has started to work in (light) crunchtime since May. So, I had no time to go on with my module. And chances I will finish it in this century are rare. Maybe the toolset is not the best tool for me to realise what I have in mind ?
Anyways.. I want to play NWN2 modules with visuals I like, but I can´t make my own game right now. So I have decided to share all my sources and areas as presets time after time and hopefully this great NWN community can use them and make some stunning modules with my sources !

Thanks to the poeple over at Bouncy Rock for giving me food for thought !

I think I will start with the release of my custom texture and brush sets along with some weather settings in the first place. I will posts further details the next days. For now I leave you with a weather setting I am currently working on (which will also be released). After all the sunshine I have previously done, I wanted to make some bad and misty weather. I´m testing it in a dark and spooky forrest. Here are the results for sunrise (of course!) and daytime:


Hope you like them ! I´m going to finetune them now and move on with the sundown and night settings.
By the way... does anyone knows a way to change the weather in one area over time ? Load different weather settings with a script or something ?

Sonntag, 20. April 2008

Into the wild

I took a walk in the woods yesterday to find some inspirations for the current area I´m building. Oh, and also some free textures of course (good thing, mother nature never heard about copyright content) !
Back at home, I decided to tweak my lightsettings for this area a bit to match with the new textures. Especially at night I wanted it to be more ominous. So here it goes...
I am nearly finished with this area. This was my first 4x4 Area. I think I got used to it quit good. And this area was a good testing ground for the upcoming area I am going to start. It has the same setting and uses the same textures. But it will be a 32x32 area. A river valley in the mountains. Sadly, we have no mountains where I live in germany :/ So I have to abuse google image search instead. But we have a lot rivers. And that is where I´m going now... getting some fresh air and more free textures :)

Have a nice sunday !

Dienstag, 15. April 2008

Faked screenshot...

I got some emails a while ago, saying my screenshots were all fake and stuff. Well, today I have to admint... this post is my first faked screenshot !

I´ve found out an easy way to fake some scenic backdrops. Do you know those ugly tree fake backdrops (Nature objects: PLC_NR_TreeCard01-06) ? I wanted to find out what happens if I paint a mountain instead of those trees. Here´s the result:


Looks like this will work out pretty well (with higher resolution and adjusted colors) ! And there´s a lot of stuff one can do with this like skyboxes, coastlines, distant clouds etc.

Josh ? Could you please do the particle editor tutorial right now ? :) I need particle clouds before that mountains !

UPDATE
Just a little sunrise (again, I know...). There some more
fake backdrops in this screenshot.


Montag, 14. April 2008

Rock on !

Just a small update.
I´ve tested the new textures today on a tiny area I´m currently working on for the next Feline Fuelled Games (FFG for now) module. It´s a lakeside with a hidden house in the mountains. So, a lot of rock and dry grass. Here´s the result:


I hope to finish the area on the weekend. I´m looking forward to test some neat texturing for the sourrounding mountains. Hope this will work out...
I´m going to have a beer (or some) now... cheers and rock on !

UPDATE (for the update):

I´ve just painted a mountain :) . Did I mention I love the painting feature ?!
So the shadows you can see in this picture are not from direct sunlight in the first place. They are just painted on the rocks !

Hope you like it like I do !


Bewitched !

Last week I needed to take a break from the toolset. After some heavy writing and area creation sessions, I was burned out a little bit (I guess this happens to everyone working with the TS from time to time).
I decided to give "The Witcher" another chance, since it was not playable after launch on my machine. The loading times between the area transitions were straight out off hell. So I patched it and started all over from the beginning.

And what should I say... I simply love it ! Great dark and gloomy atmosphere, rememberable characters and a compelling story ! A lot has been written about this game, so I think you know what it is about. If not... go and play it !
Of course my main reason was to get a closer look at all those fantastic looking areas. From screenshots, every view looks like a painting. Perfect use of color pallets and lightning. And I think I can say I have learned a lot about the texturing and lightning techniques the developers used. I have also figured out a neat trick they do with backdrops in the background, faking some great vistas (like in this picture here, all mountains in the distance are just simple painted planes). I will try to do adept this in the TS soon.

Besides that, I have joined a german NWN2 modding group called Feline Fuelled Games (Hi guys!). I love their modules they have previously finished and I will do some areas for the their upcoming stuff. In return, I hope to finish my little project with their help.

Learning from the witcher, I have painted a whole new set of textures for my upcoming areas. I will post some shots of them within the week.

But for now I have to go back to Geralt and solve some mysteries about an old druide tower in the swamps of Wyzima :)

Donnerstag, 3. April 2008

Hitchhikers Guide to Eden - Part 2: Island hopping

Hi again and welcome back to another issue of Hitchhikers Guide to Eden !
I would like to show you a texturing and painting workflow I have recently done. I usually go through these steps with every area after I have finished shaping the basics of the landscape. I´ve choosen a (really) small remote island out of the endless ocean for my test object.

Texturing
Please note, that I use a very bright light settings to get a high contrast, tropical sunshine. Therefore I have to paint the whole area with a mid grey tone, to actually see the textures instead of a glearing white.

  • So, this is the basic position. A small risen dot in an empty area full of water. I choose my basic sand texture for the base layer and fill the whole area. So, nothing special here...


  • After that I start painting my base grass textures with 100%pressure. I always try to paint kind of clustered and connected shapes when it comes to grass textures. I will add palms and grass there next. And plants usually grow in "chaotic systems".But this is more crucial when it comes to larger terrains. For now, I just wobble the mouse to get some shape like this :)


  • Next, I add the second sand layer. This textures main function is to blend the grass with the base sand. I sourround the grass shape I have painted before. I don´t care for details at this point and paint it also with 100% pressure.
    While doing this, I try to feather the borders of the grass shape to make it look more natural (chaotic) grown.


  • Now I´m coming back to my base sand texture. With it, I feather the second sand layer, like I did before.
    I usually use a 50% brush when this is done to blend the textures a little bit more on some edges. One must be careful with that, because you get a blurry look very fast when you overleap textures. I try to focus only on the edges of texture shapes. And to summarize this: I always texture from the top to bottom layer.


  • Now I add some curly palms on the grass layer. I try to use not too many tree variations. Instead I differ the scaling a lot and how deep the trees trunks stuck in the ground to get some different heights. As for the grass textures, I usally try to form palm clusters with some space between them (well, this is a very small island, so it´s not that important here).
    Scaling is one of the most crucial points (next to light) when it comes to level design in my opinion. So I add a NPC to see how heigh the trees actually are. And trees are quit big commonly (unless you are designing a tree nursery!).

  • Adding the detail grass layer is next. Nothing special here I guess, because of the little space of this island. Like the textures, I always paint the big plants first and then move on to the smaller grasses. Doing this right it gives the plants a natural grown look (one can also hide those ugly edges on the gound where the grass is placed).


    So here we go.. Quit green I think...


    I´m quit pleased with these results of this fifteen minute work. But not happy :) ...Because this is only half the work.

Tainting
I have found out, using the color toos is very powerfull, when used focused. It is perfect to simulate light and shadows (especially in full and bright daylight), give whole areas a rich color variation and to blend textures much more naturally. You can just paint moss on stones, make small ponds deep and muddy or even simulate a giant shadow of a mountain that darkens the valley beaneth it. For this island, I wanted to try something new and paint a tropic ocean.

  • Let´s start with the shoreline. This is a shot of the unpainted area. No, this is not true. Like I have mentioned earlier, I have of a mid grey tone painted overall the area. So I have darkened my textures this way. This is to be a huge advantage now.


  • The thing I do, is to paint the sand wet with a slightly darker grey tone (since I like my natural sandcolor). I try to imagine the waves, flushing on the sandy shore and paint these small areas even a little bit darker.
    Now I want to make the sand much brighter, hit by direct sunlight with no clouds before it. So I paint on it with a lighter color. This way, it is even possible to simulate cloud shadows or snowy mountains, just hit by the sunlight on their tops (like this).
    I also tone the grass texture a little bit darker and with more saturation.
    Now comes the fun part. Defining the actual water color for the shoreline. I want an emerald tone for it, so I surf google image search for references (I just love it!). I should mention, that I have the water shown and the fog turned on most of the times, because I want to see the final results and match the right colors. So, I paint one water color and try to match the one from a reference photos from google I like. The colour I have choosen will be the basetone of the following.

  • Next is the ocean. The first thing I do is to raise the terrain just below the sea level. This is much easier painting in the first place and it fits perfect for this small island with shallow waters. Another point here is, it is easy to nearly even the ground and the water level at the horizons. This is a good way to fake an "endless ocean".
    I choose myself four main colors of the previously selected color and paint them gradient away from the island. This way you can give the ocean different heights. I use the lightes tone to simulate heigher grounds like sand banks and darker colors for lower grounds or an abyss for example. This can take a lot of time testing, but the good thing about tainting is, that you can easily replace the colors for larger areas. Okay so far, but I have decided to use these colors for another area and go on to make it a little more rockily and paint kind of a riff instead of sand.

  • Surfing google again, I have found some perfect pictures of tropical reefs (like here and especially here). While looking at (a lot) of them, I try to figure out the main shapes and colors of it and adopt them into the toolset. In this case, I have painted some sandbanks and "dotted" darker colors of the same tone around them. And again, I paint from top to bottom and tryied to get some clustered reefs. This is a lot of chaotic painting, but also a great fun ! It is not easy to explain in the end, but this picture shows more than words I guess !

  • The last thing I do, is paint the acutal reef. They are mostly clustered in round shapes with sand in it. Like chains, I have connected these single features with smaller reefs. I use a dark stone texture for this I also plan to use on cliffs later in that area. I have splitted the screenshot to point that out a little bit better.
    You don´t have to be accurate in this whole process. This is just about messing around with... water colors :)


    Well, thats´s pretty much it. So, turn the light on in your areas and start to paint and taint the hell out of them !

    Looks like there is some more work for me to do. This was just that small island on the right over there... Man, I need holidays !

Dienstag, 1. April 2008

Got water ?

While I was translating some lines of my scripts, I "accidently" found this picture on the web. I just wanted to do a small painting test on the coast region of my island to see if I could get such colors for my ocean. So I started speedpainting some reefs. After a lot of tainting I came up with this:

I´m quite happy with this result. But I think I can do better... but maybe not at 2 o´clock in the morning :) If you are interested, I can post a small tainting tutorial the next days.

Montag, 31. März 2008

Deadline for the area contest: Right now !

I have received some emails lately if I´m going to submit something for the area contest. Sadly this is not the case. I was really looking forward to take part, but at this time I didn´t know march was going to be a very stressful month.

But besides that, another reason was, that I had not finished the area I wanted to sumbit. A week before the announcement of the contest, I decided to revisit mainparts of the story and because of that I had to roll up some bigger parts of the main island. And because of that little time I had working on the area, it stays a messy construction ground during the whole month. I guess thats faith :) Anyway... I wasn´t sure for the price at all. Where to get two additional monitors ? And mother nature will thank you for your joy playing games with three times more comsumption of electricity ! (I hope the winner thinks about that at least for a second.)
I´m very exited about the entries and I have tested some of them. I´m very curious who will win at the end and I keepmy fingers crossed for my favourite :)

Now it seems that I have finally finished my start island yesterday ! All locations are now content ready and the dodgy story outline is nearly finished. I just have to rewrite it and put it in a readable form :) And after that translate it into english. A light at the end of the tunnel...

I thought you might be interested to see what I mean by writing "major changes in the areas". I have found an old shot I took from the heart of the start island when there was just a cozy clearing. But it went out, that this would be the perfect place for a camp, sourrounded by some old ruins. Today I made a screenshot to show the before / after effect:

Before


After

You see what I mean ? And don´t worry, there are some clearings left. Ironically this makeover was the easiest to do, but I wasn´t aware of that when I started on reshaping some roads and placing new doors. I had a terrible (door) bug that nearly made my quit working with the toolset... But I don´t want to talk about that anymore :/

I also wanted to include a quit big cave to contest areas, because it simply connects some other finished areas. After pausing in frustration for some days I made a major rebuild on that cave too. Sadly I have no shots of the old version anymore. But on the left is a sneak peek of the new one, or at least an underpopulated part of it.

I hope Obsidian is going to start some more contests in the future. Peferably during a holiday season !

Seems I´m into a typing mood right now. I should use that chance and start to translate my scripts...

Sonntag, 30. März 2008

Hitchhikers Guide to Eden - Part 1: Preparation

As announced yesterday, here is the first part of a making of / progress documentation I want to post. It should show you my default workflow when I´m starting a blank area and focuses on custom textures and basic painting techniques. I won´t go into light settings for this time, since this is a chapter for itself but also a point I put a lot of work time in. So here I go...

I always start with puzzeling a heightmap in photoshop. The one I used for the island is a combination of a generic terragen terrain and a DEM image I´ve found on the internet. I have painted them together in photoshop.

Parallel to this I usually use 3DMax to make a testrender of the actual heightmap 
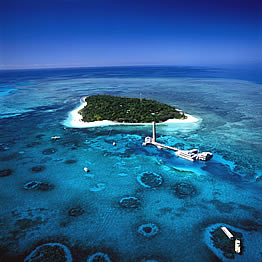
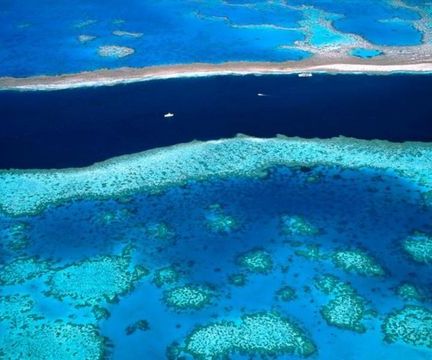
to get a better feel for the different elevations. I don´t make the heightmap very detailed at that point. Mostly I just figure out where the main feature spots should be located and if the area fits the overall topographical look I´m aming for. In this case, I was after a large tropical island, like a typical seychelles landscape. So I have surfed the net for inspirational pictures like these.

Pleased with the results I then start importing the heightmap into the toolset. Thanks to YATT, this is a piece of pie. I usually do a lot of reshaping after that for many hours to get the main pathes digged into the terrain.

Often I walk around the areas in search for good vista points. From there I start planning the features of these nice views I have found. My philosophy in all areas is to have at least one scenic view when turning around 360 degrees from every point on the map. In this picture you can probably see that I have made many changes, including adding a jungle river and a (walkable) vulcano / mountain region in the north.


I have customized every texture of this area and also a lot of grass I´m planning to use. It was very hard to get the colors right, because of my bright lightsettings. I wanted to achive a colorful look with a lot of contrast like I had seen on all the different pictures of a tropical paradise. Before, I had to decide if I want to make a carribean isle or a seychelle like landscape. They differ a lot in color and foilage. I decided to go for the more tropical setting in this area. So I started painting the custom content.
I usually use two matching textures for sand / pathes, grass and stone. On the left you can see the results I came up with.

After that I have tested a lot with custom grass. At first I had to change the textures of the palm, because they were quit yellow when the sun shines on them during the daytime. But I wanted to gloom them in a rich green instead. After I had finally found the right colors and contrast, I started with the grasses. The crucial thing here is to match the different grass colors with the palm trees. After two days testing I came up with 4 different tropical grasses, two palm like plants and five tropical bushes.

A main problem with this area when it comes to texturing was, to decide which base texture to use. Is this island a rock covered by grass ? Or is it a mainly full of tropical grass with the mountains breaking trough the surface ? It took the rocky option one in the end. One main reason for that was, that I had found a trick to fake a lot of distant foilage details without forcing myself to paint the whole island green. I wanted to use grass decals for that.

To get this done, I have fired up SpeedTree. I took some snapshots of trees from four different angels to use them as the four different grass blades withing every grass texture. This grasses should fake the dense tree populations usually found on tropical islands (like here). This would give the whole area a lot more scale when viewing from a distant (wich will happen a lot, since I have found some great vistapoints). This test pictures should show you what I was up to:I think you get the point with these pictures. The great thing is, that this feature does not cost a lot of performance. So I had everything ready to start some serious works. All locations were shaped, the pathes digged and all textures and grass were painted. But where should I start to build ? Where will the player probably start ? Where will he start his journey and what is the first thing he will see and when he turns around a specific corner ? I´m always asking myself these questions during building areas.

I will post my answers to these questions in the next issue of the Hitchikers guide to Eden - Part 2.

Greetings from Paradise

I´m very exited today, because I started to work for real on the island. I did a lot of testing yesterday, I started to search for a perfect little place to start shaping for real this time. After rebuilding a small beach region I was ready to fire the first textures on it. And after eight hours of painting and tainting now it looks better than I hoped !

I want to post a progress diary / making of this area tomorrow. But for this post now I just want to share some tropical beaches with you... :


I´m finally going to bed now.. probably dreaming of three headed monkeys ! Harr !

Freitag, 28. März 2008

Hallöchen and welcome to my blog :)

After three month of silence I think it is now the right time to start this blog :)

I´ve been quit busy with my job the last 8 weeks, so I didn´t find the time to start a new thread in the NWN forums or update this blog. But it looks like I have a lot more freetime the next weeks. I promise to update these pages more frequently. Well, I think I promise myself. Let´s see if I can make it...

The reason for this blog is the show the progress of my toolset works (that will hopefuly turn into a module soon). I love the blogs of the other nice guys in the NWN comunity and I surf them quit often a day. I am very exited what they are all up to with their modules currently they have currently in the works.
As for my little "Project Eden"... I had a lot of thinking about the story. I wasn´t sure it was something special at all but thats what I initially wanted to achive when I started working with the toolset. Like I said, I love other builders modules but I am not really into that D&D stuff. Till this day I haven´t played NWN2 beyond Neverwinter at all ! But that´s just because I didn´t get to learn the universe of D&D. So I started my own little universe. Nothing really special by now, just a map, some screenshots but a lot of ideas !
And after thinking and reshaping the "thin red line" of the
story, I think I finally came up with something that satisfied at least myself. Only some more lines to write and I think I´m ready to release a version of the island along with the storyline to the ones that were interested working for the project. I hope they will like it too.

Anyway... next to rewriting the story I have started working on a new area last sunday. I just had to paint some textures instead of typing letters :) It´s a really big tropical island. I have finished the rough landscape shaping yesterday. All possible pathes and all bays are at their place. And today I have reworked nearly every grass that was available in the toolset. It impossible to creat what I have in mind with the grass that comes wi
th the toolset. I plan to release them as prefabs along with my textures sometime in the future. I will post a screenshot of them tomorrow when I start working on a remote tropical sandy beach... I´m really looking forward to this since the wheather here in germany is grey and rainy at the moment ! For now I leave you with a screenshot I took in my first night of the new island :)


Thanks for reading... see you in the next post :)

P.S. I still need a appropriate name for that island ! Got some ideas for a tropical, pirate style name for it ?

Donnerstag, 24. Januar 2008

In Vorbereitung / Under construction

Dieser Blog wird die Anlaufstelle für die Neverwinter Nights 2 Mod "Eden".

Falls ihr Interesse habt, laßt mir eine Nachricht da:
at@rocknrollgames.de

----------------------------------------------------------------------------------
Neverwinter Nights 2 Mod "Eden" HQ currently under construction.

Interrested in joining ? drop me line:
at@rocknrollgames.de